Printed ASCII art is a fabulous gift for a geeky friend. The great thing about coded artwork is that you can easily give it your own personal touch! It’s a stylish decoration that looks great on mugs, t-shirts, and even curtains. Making ASCII art is much easier than it looks, and I’m going to show you how to do it in Python!
We’ll use a few Python libraries — Pillow, Colour and Numpy. Pillow handles all the image processing - reading, resizing, writing. Colour gives us the beautiful gradient color. Numpy makes the grayscale conversion easy. Once you understand how sample codes work, you can change fonts/symbols and try out different colors, to turn your favorite picture into your unique signature artwork.
Prerequisits: Install Python 3 and libraries Pillow, Colour and Numpy
Table of contents
Open Table of contents
Step 1: load a picture
The Image class in PIL (Pillow) provides a lazy function Image.open to open an image file. At this step, we only identify the image but not actually load it into memory. Image supports a variety of image types including bmp, jpeg, gif, eps.
from PIL import Image
#open the input file
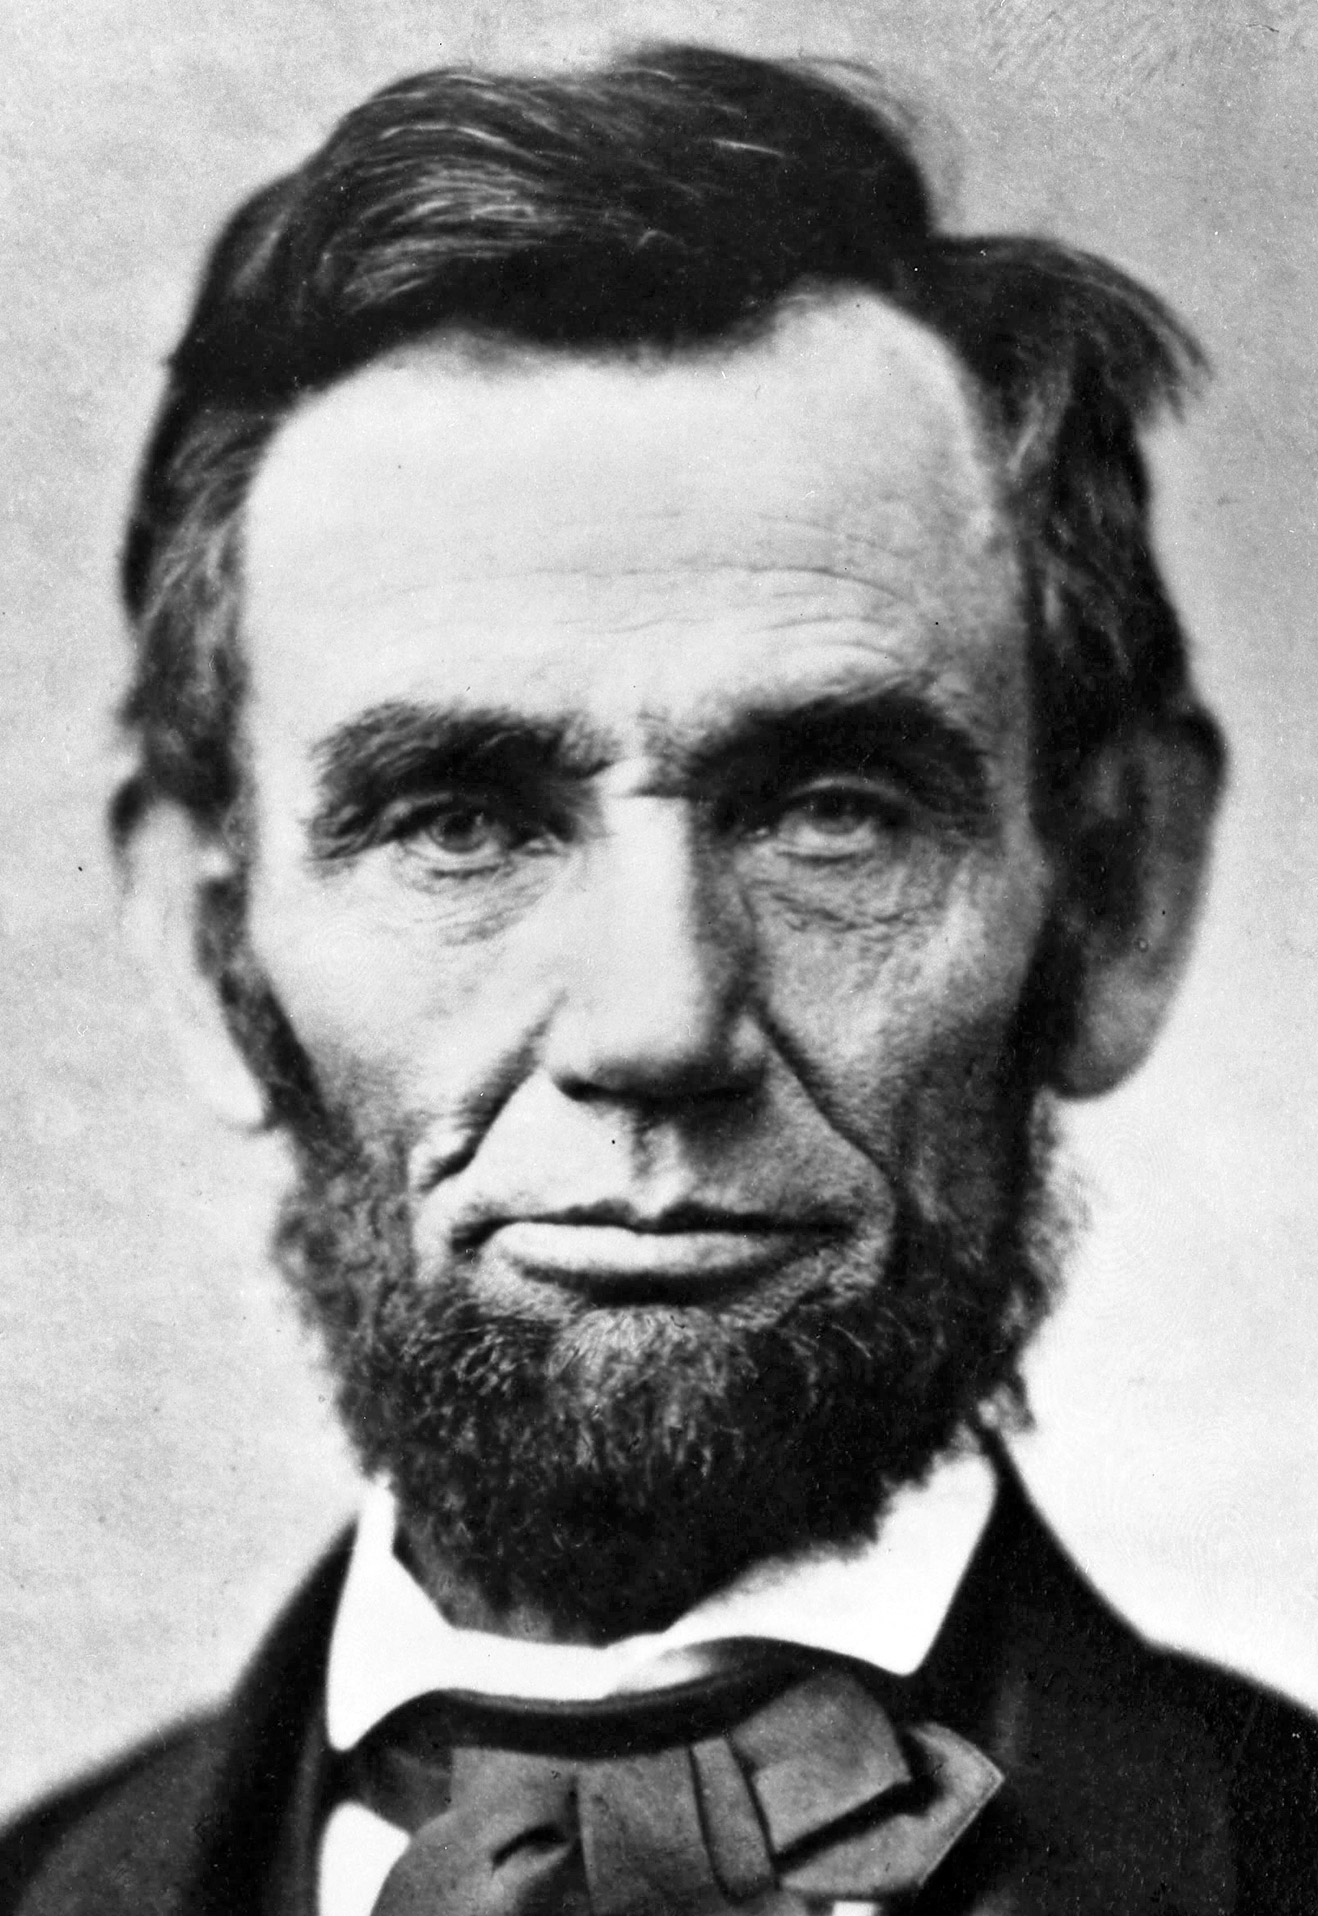
img = Image.open("LincolnPortrait.jpeg")Step 2: resize the picture
ASCII art is composed of symbols. Symbols naturally have different degrees of darkness because of their shapes. For example, . is whiter than : which is whiter than !. It’s easy to illustrate a range of grayscale with symbol patches.

One challenge as you can see from above is that symbols are not necessarily square. If we simply replace image pixels with symbols one-to-one, we will get a picture with distorted width and height. To avoid deformation, we need to carefully calculate how many symbols to use in each row and column in the new image.

Another thing to notice is that a symbol is much larger than a pixel(px). So it’s not a bad idea to reduce the picture resolution before the conversion. Our program handles the pixel reduction using a scaling factor SC between 0(exclusive) and 1(inclusive).
font = ImageFont.load_default()
letter_width = font.getsize("x")[0]
letter_height = font.getsize("x")[1]

WCF = letter_height/letter_width

widthByLetter=round(img.size[0]*SC*WCF)
heightByLetter = round(img.size[1]*SC)
S = (widthByLetter, heightByLetter)

img = img.resize(S)
Step 3: convert colors to grayscale
Since img.resize(...) returns an Image object, it contains RGB values of each pixel on the image. There are a few methods to convert RGB color to grayscale (John D. Cook describes them well in his post). Here we simply take the average of RGB values and normalize them.
img = np.sum(np.asarray(img), axis=2)

img -= img.min()
img = (1.0 - img/img.max())

# (optional) adjust the image brightness
img = img**GCF
Step 4: create an ASCII art image
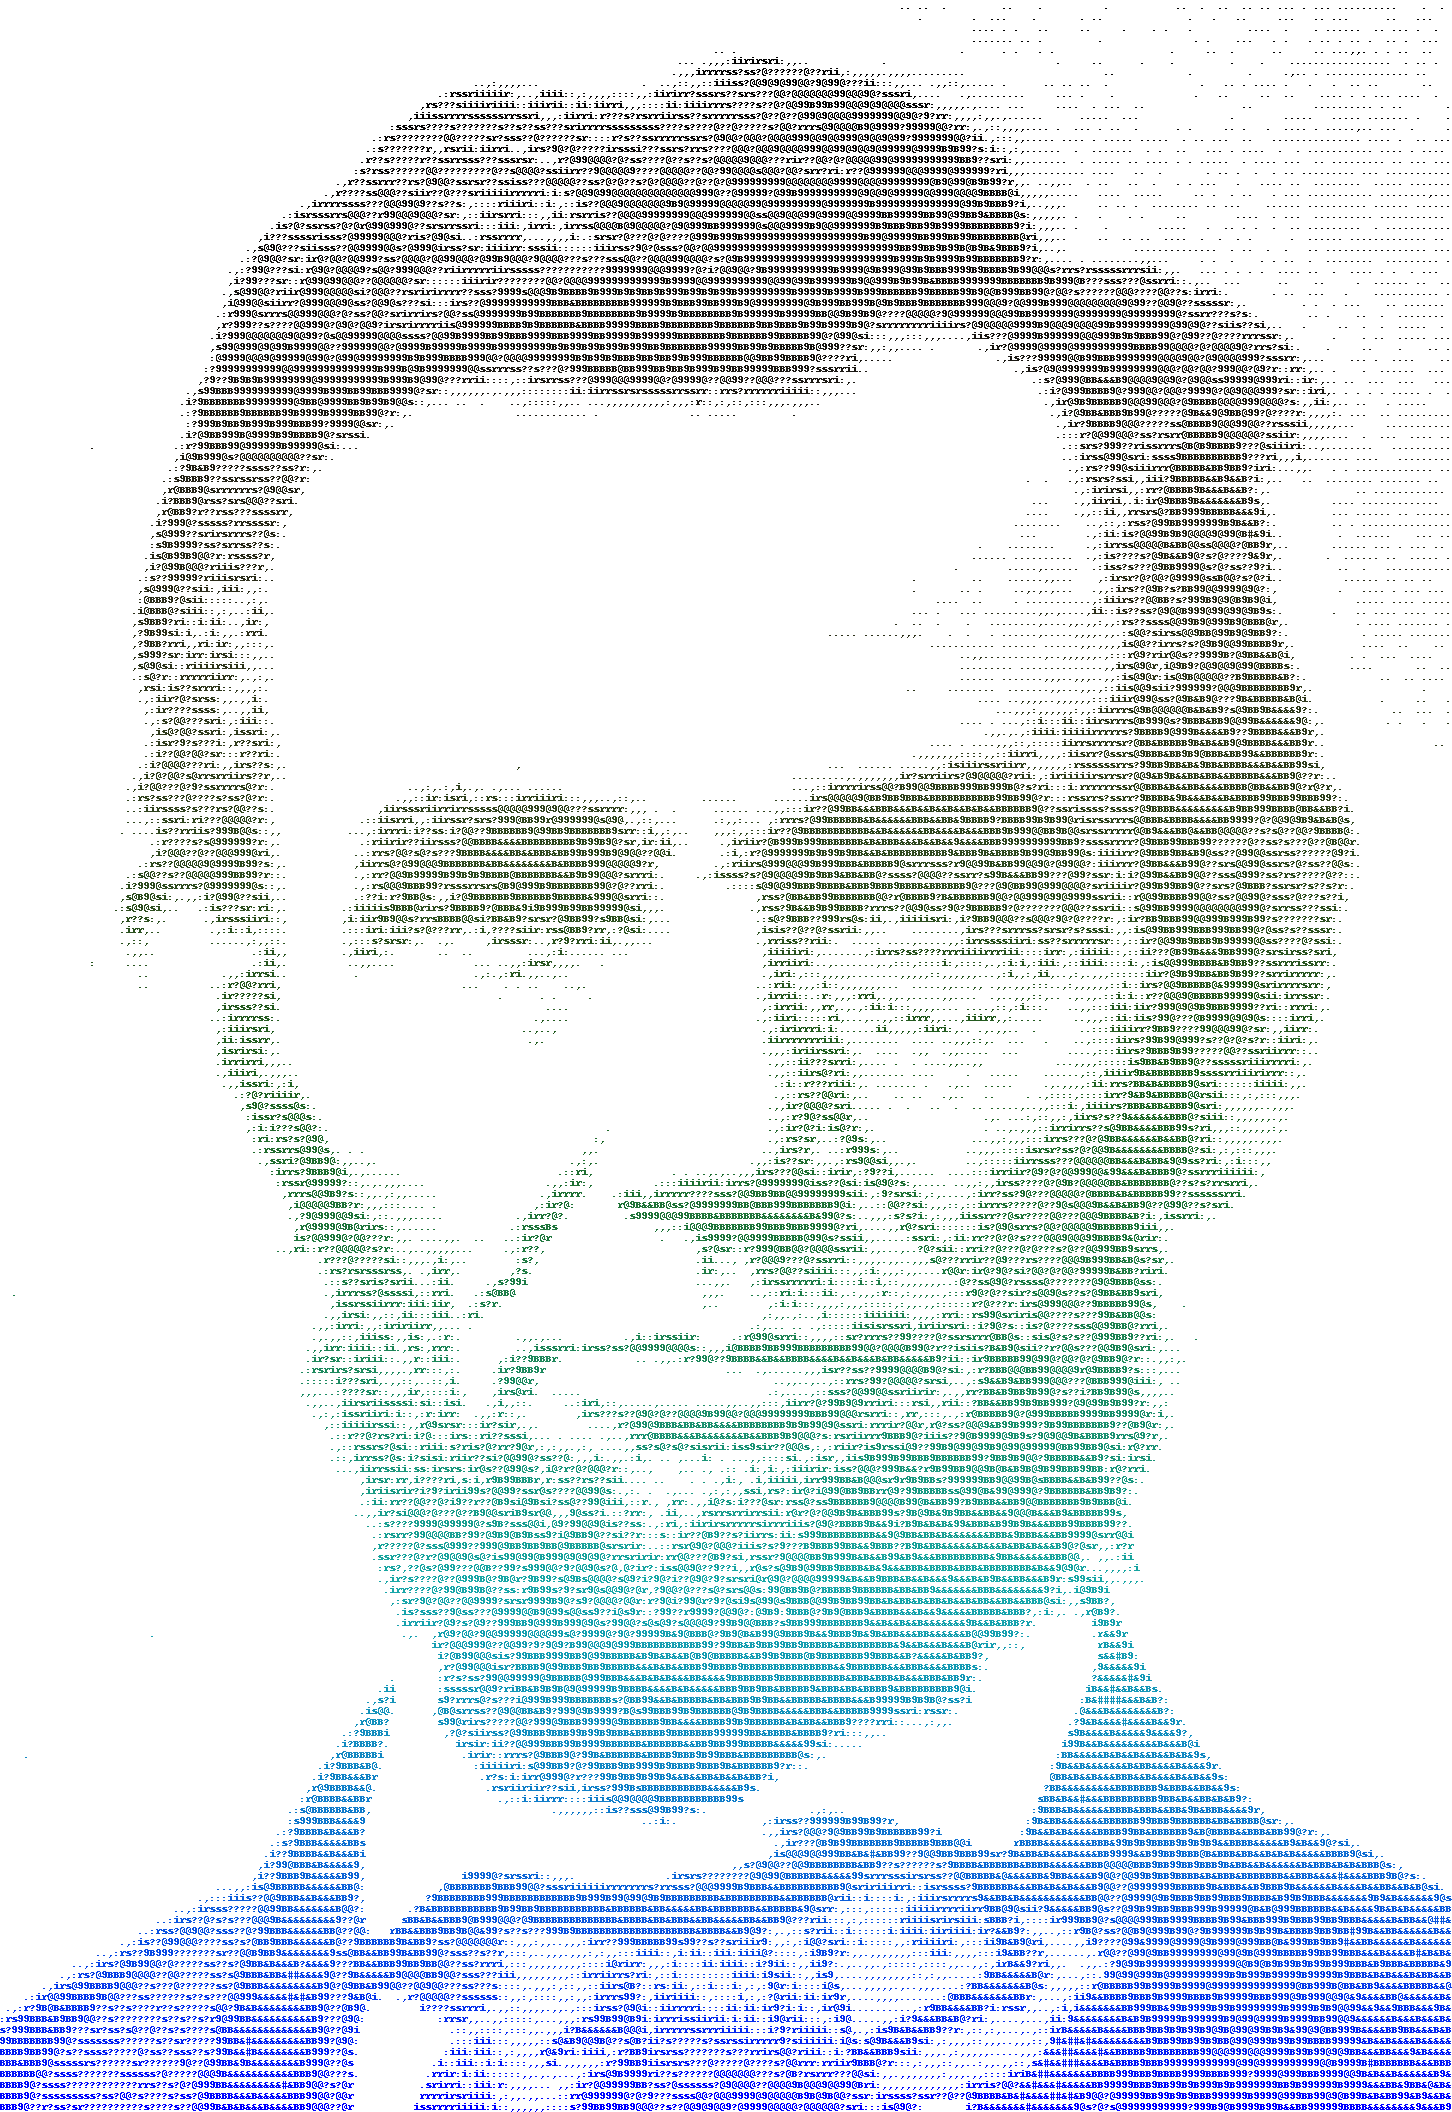
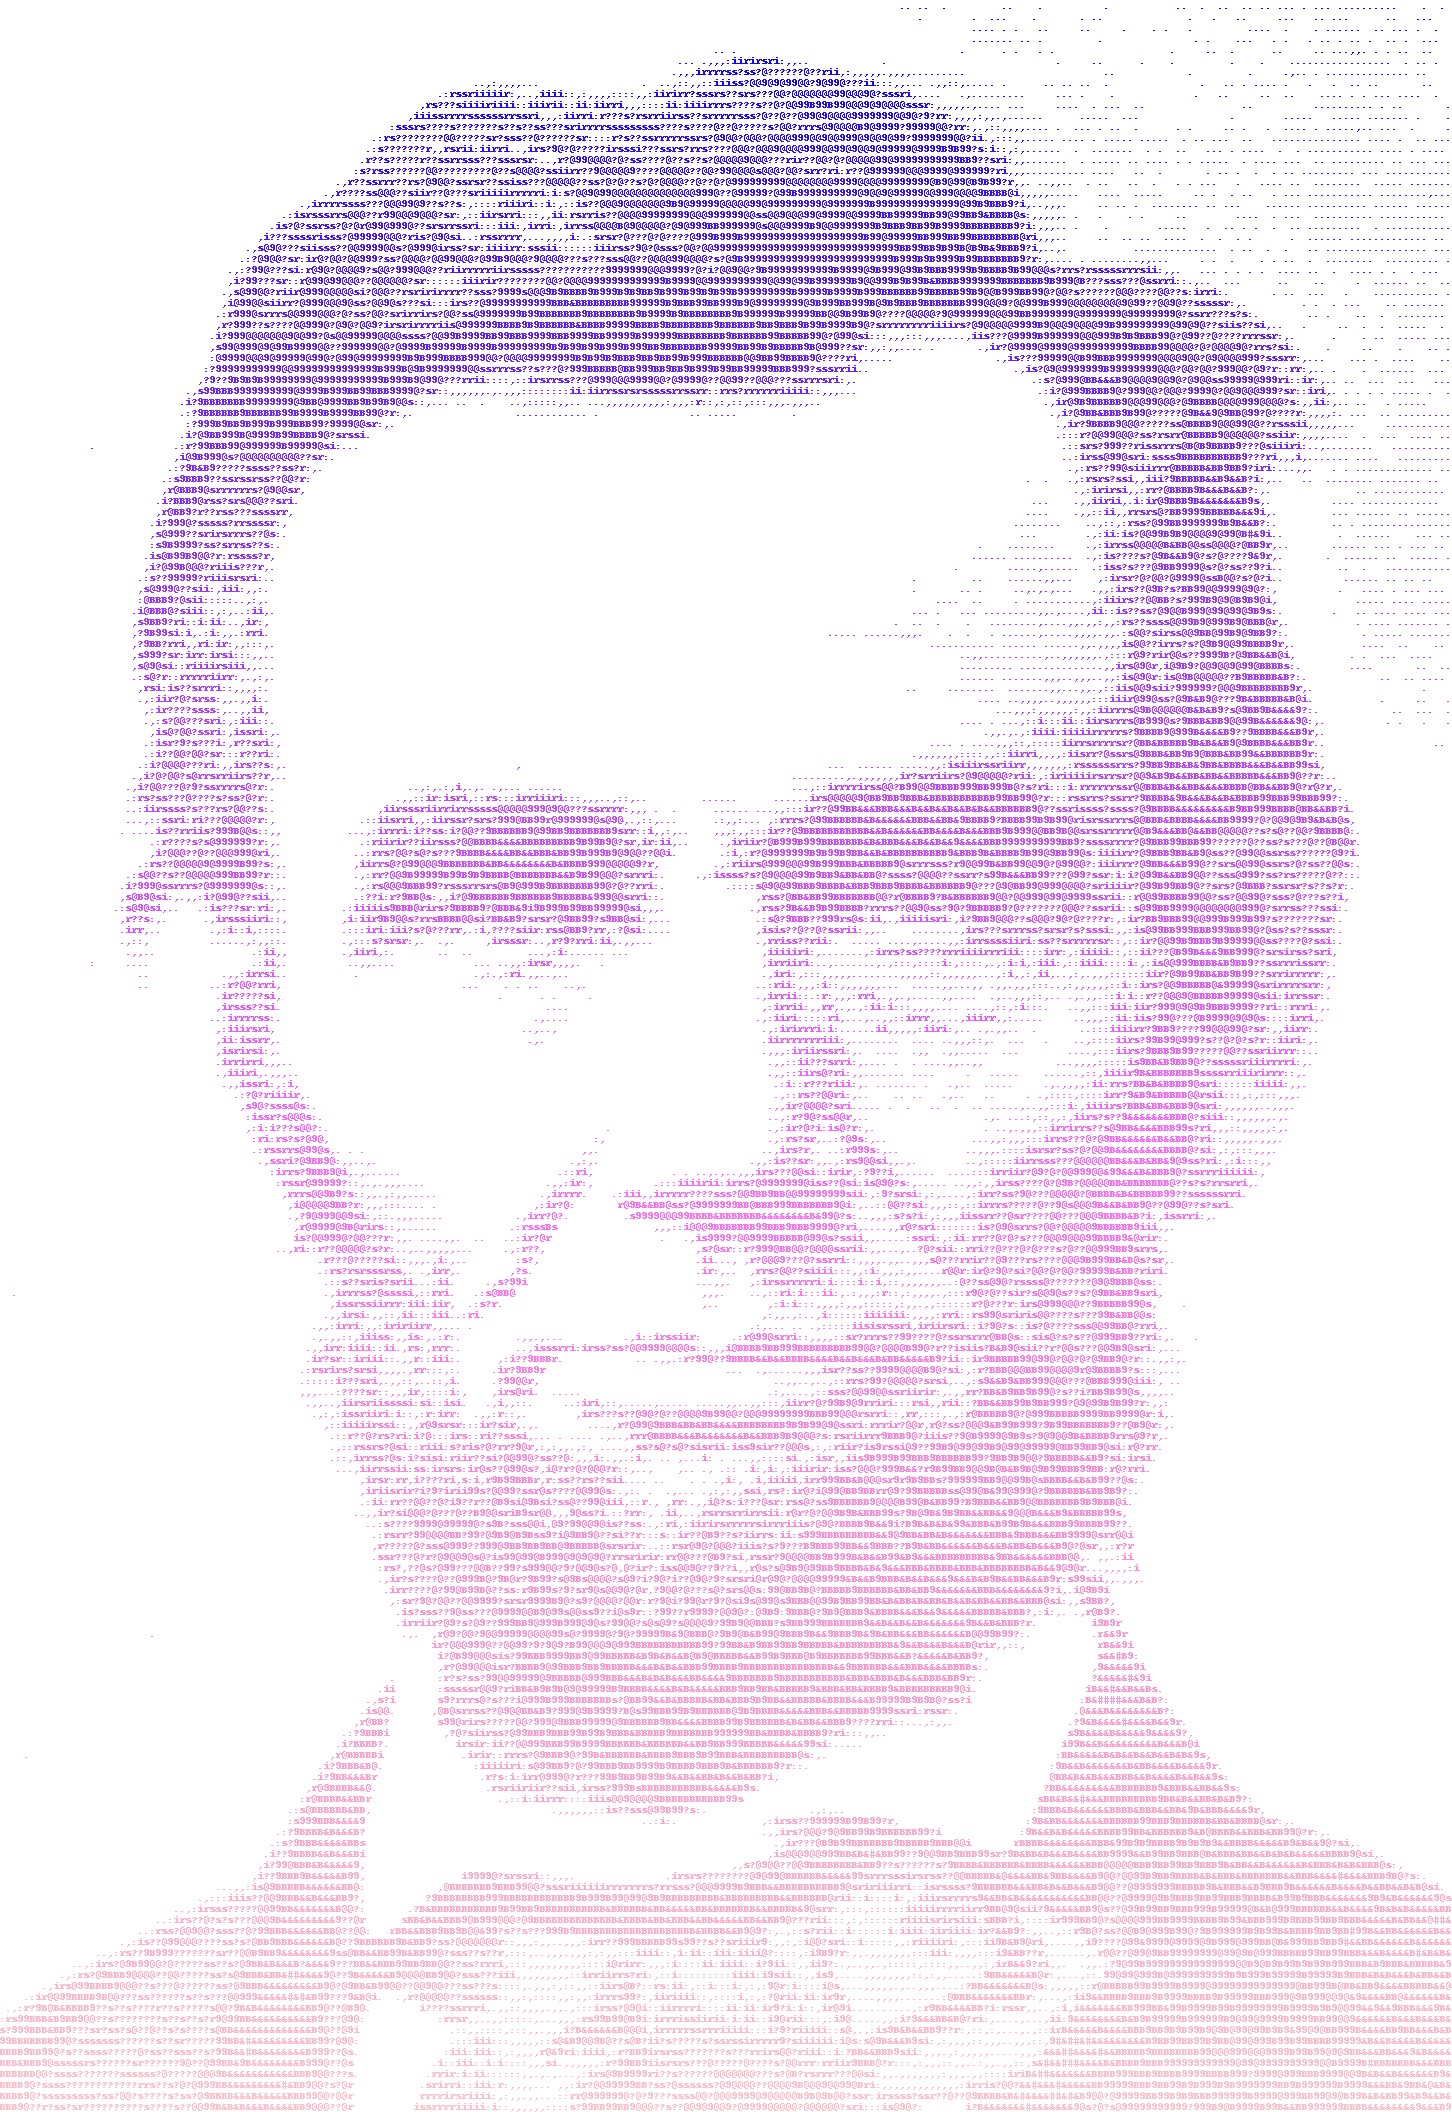
The next step is to map grayscale to symbols of different darkness.
chars = np.asarray(list(' .,:irs?@9B&#'))

img = img*(chars.size-1).astype(int)

lines = ("\n".join(
  ("".join(r) for r in chars[img]) )).split("\n")

bgcolor='white'
newImg_width= letter_width *widthByLetter
newImg_height = letter_height * heightByLetter
newImg = Image.new("RGBA", (newImg_width, newImg_height), bgcolor)
draw = ImageDraw.Draw(newImg)

nbins = len(lines)
colorRange = list(Color('black').range_to(Color('blue'), nbins))

leftpadding=0
y = 0
lineIdx=0
for line in lines:
    color = colorRange[lineIdx]
    lineIdx +=1
    draw.text((leftpadding, y), line, color.hex, font=font)
    y += letter_height
Step 5: save the image
newImg.save('result.jpg')Click here to download the sample code. Change the input file name in the bottom section and try it with your own image!